Products can be added to the platform in two ways:
- Importing all products at once using an import file.
- Adding products manually, as described in this article.
This article covers all the settings available for a product.
Before adding a product, make sure you have already created the category in which you want to include it.
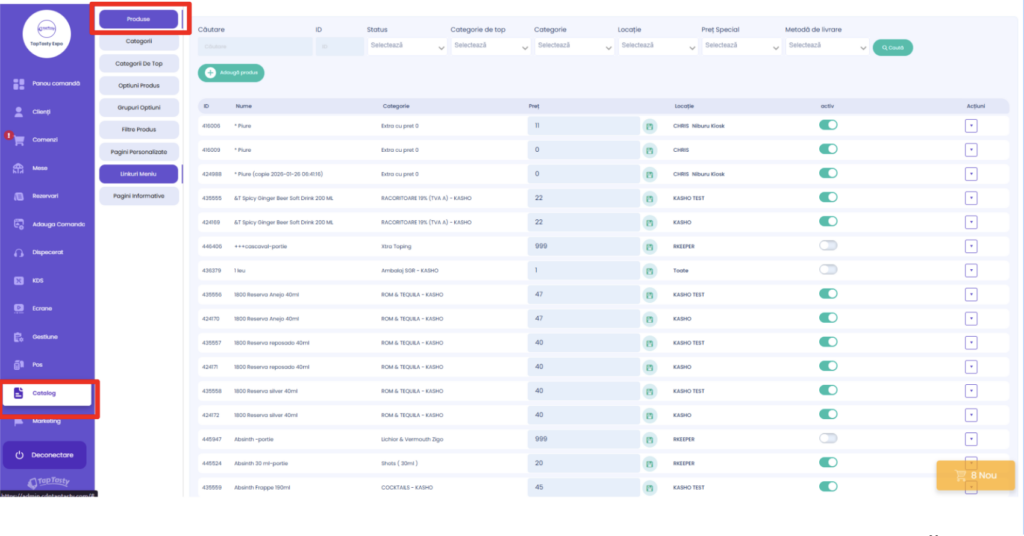
Once the category is ready, go to Catalog → Products
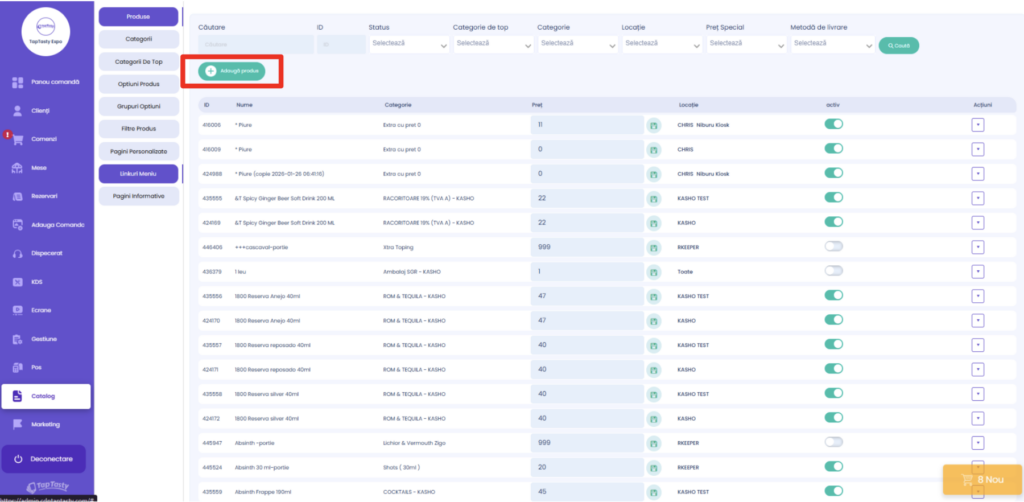
Then press Add Product at the top of the screen. A panel divided into multiple sections will appear on the right side of the screen.
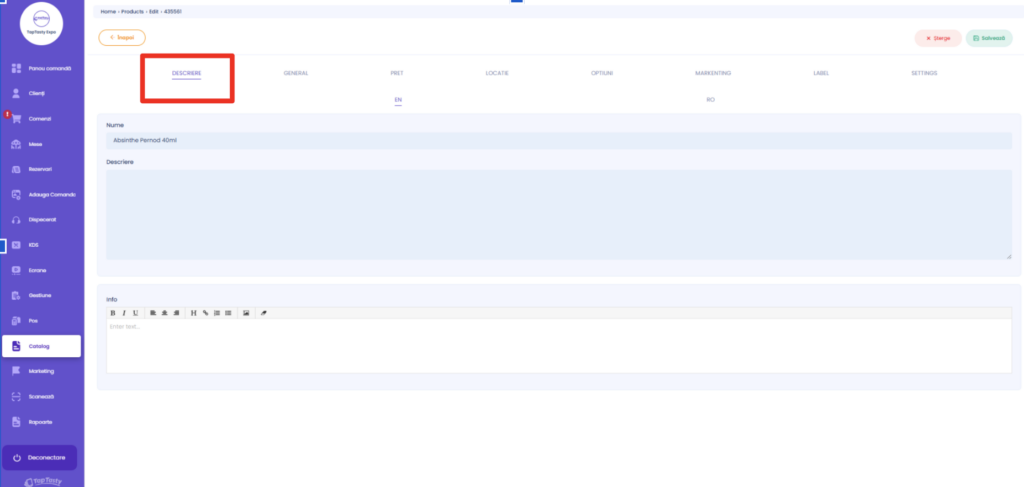
Description
Name (required)
Enter the name of the product.
Description (recommended)
Add a relevant description to provide customers with more details about the product.
General
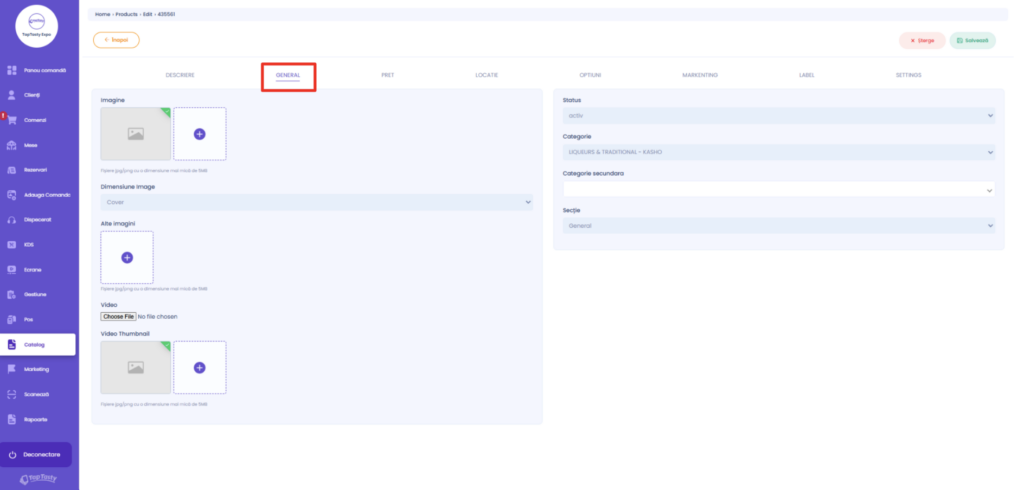
Image
Upload a representative photo of the product from your device or storage. Only one main image can be uploaded. To remove it, hover over the image and click the trash icon.
Image Size
Defines how the image is displayed:
- Cover — the image is automatically resized to fill the available frame.
- Contain — the image is displayed in its original proportions, without cropping or adjustment.
Additional Images
Allows you to upload multiple photos for the same product. These are displayed as an interactive carousel that scrolls automatically when the product is viewed.
Video
Use the Choose File button to upload a video associated with the product.
Video Thumbnail
An optional field for uploading a video thumbnail. This can be displayed even when the product already has a main image.
Status
Sets the visibility of the product:
- Active — the product is visible and available for ordering.
- Inactive — the product will not be displayed in the menu.
Category (required)
The main category of the product. This field is required to save the product. Select it from a dropdown list containing all available categories. Categories must be created before adding the product. The category determines how the product is grouped in the menu visible to customers (ex.: Pizza, Drinks, Desserts).
Secondary Category
Allows you to associate the same product with a second category, keeping the same characteristics (name, description, price, etc.).
Section
Defines the department to which the product order will be sent (ex.: kitchen, bar). Selecting a section is recommended when KDS screens are used. If no section is selected, the product will appear in all available sections.
Price
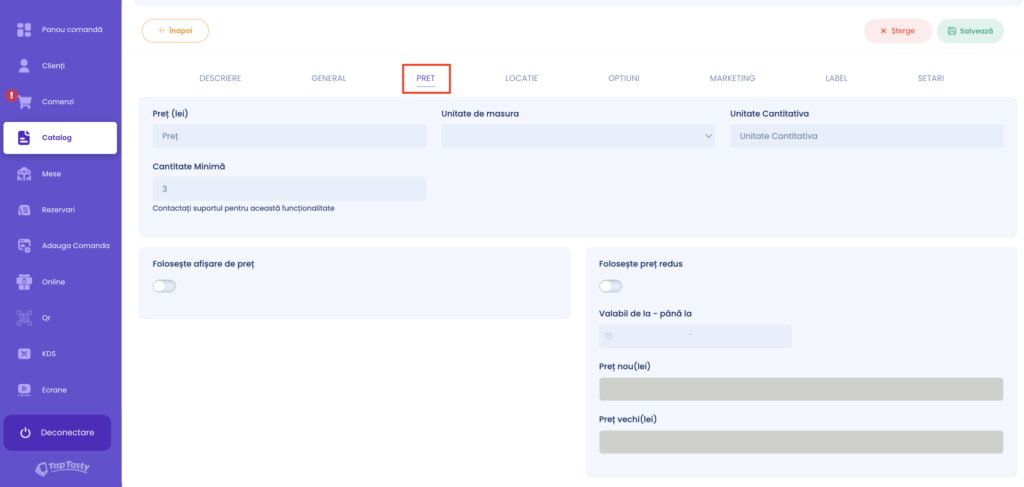
Price (RON)
The base price of the product, expressed in RON. This will be displayed in the app and used when calculating the total order value.
Unit of Measure
Sets the unit in which the product is sold (ex.: pcs., l, ml, kg). Displayed alongside the price and description.
Quantity Unit
Specifies the serving or packaging format of the product (ex.: portion, box, glass, grams, half a kilogram).
Minimum Quantity
Defines the minimum quantity that can be added to the cart. Useful for bulk products or those with sales restrictions (ex.: minimum 2 pieces).
Use Price Display
Enables the display of the adjusted price when the product contains options that modify the final price.
Use Reduced Price
Allows setting a promotional price for the product. The discount percentage will be displayed automatically.
Valid From – Until
Defines the period during which the discount is active.
Location
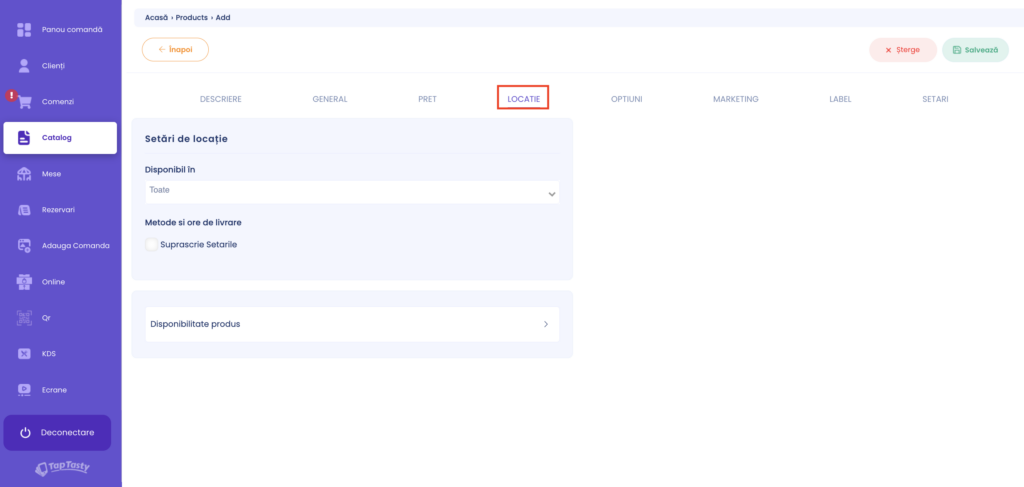
Available In
Select the locations where the product is available. If no location is selected, the product will be available in all locations.
Override Settings
Allows modifying the default settings for locations, delivery methods, or prices.
Delivery Methods and Hours
Configure the delivery methods and time slots specific to the product. Useful for differentiating availability between delivery, kiosk, or other sales channels.
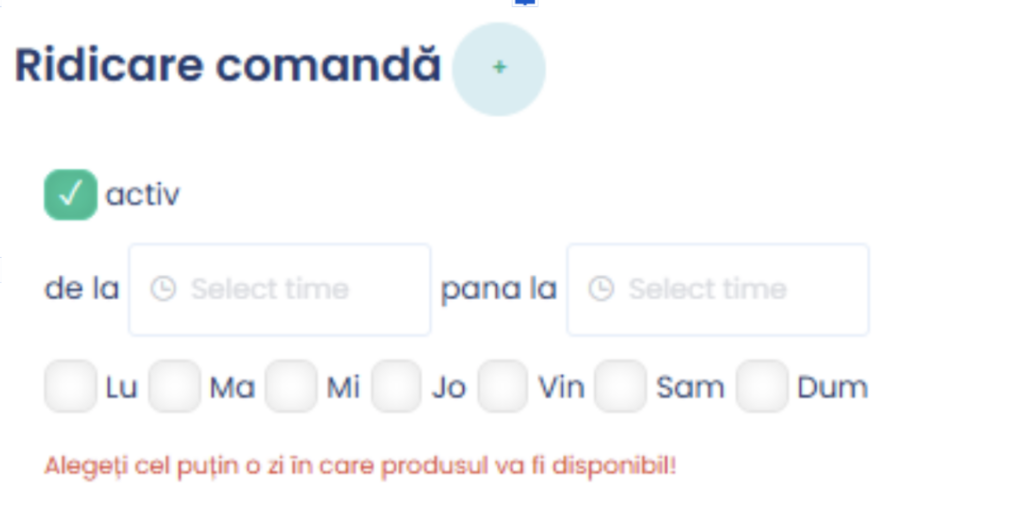
Product Availability
By enabling the Product Unavailability option, you can set time slots during which the product is not available for ordering.
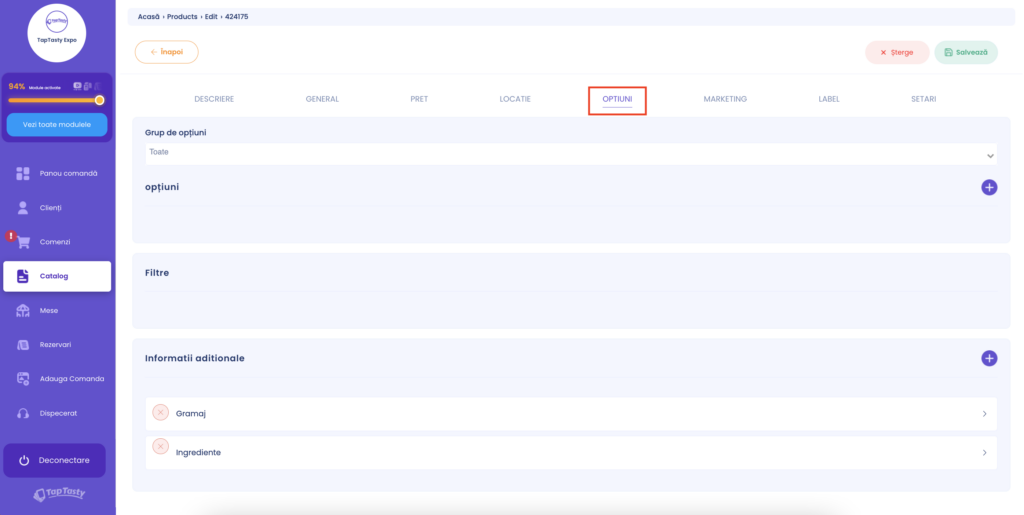
Options
Option Group
Allows associating an already created option group with the product.
Options
Allows configuring custom options for the product. Useful when certain options apply to a single product only (ex.: extra ingredients for pizza).
Option
Select the desired option, previously created in the dedicated section.
Required
- Yes — the customer must select an option to add the product to the cart.
- No — the option is optional and can be selected upon request.
Hide Prices
Hides the prices associated with the options in the selection list.
Pre-select First Option
If enabled and selection is required, the first available variant will be automatically selected.
Add Option Value
Allows adding the available variants for an option:
- Value — the name of the option.
- Price — the cost associated with the option.
Additional Information
Allows displaying supplementary information such as allergens, special ingredients, or other important notes.
Additional Information
Allows displaying supplementary information such as allergens, special ingredients, or other important notes.
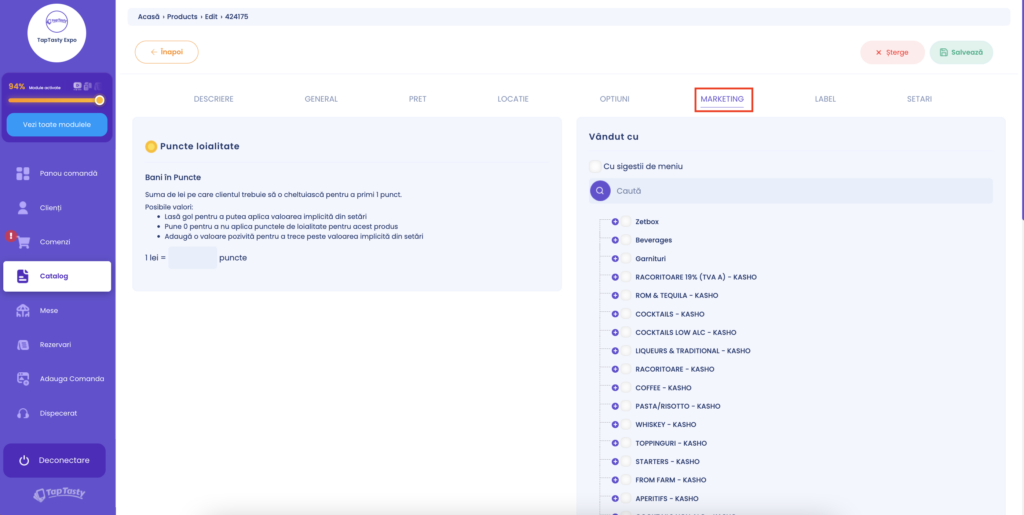
Marketing
Loyalty Points
If you want to use a different loyalty points conversion for a specific product compared to the standard rate, it can be configured here.
Sold With
Allows recommending additional products alongside the main product.
With "Menu Suggestion" enabled
Recommended products are displayed before the main product is added to the cart. For example: a simple burger can be paired with a full menu (burger + fries + drink).
With the option disabled
Recommended products will be displayed after the main product has been added to the cart.
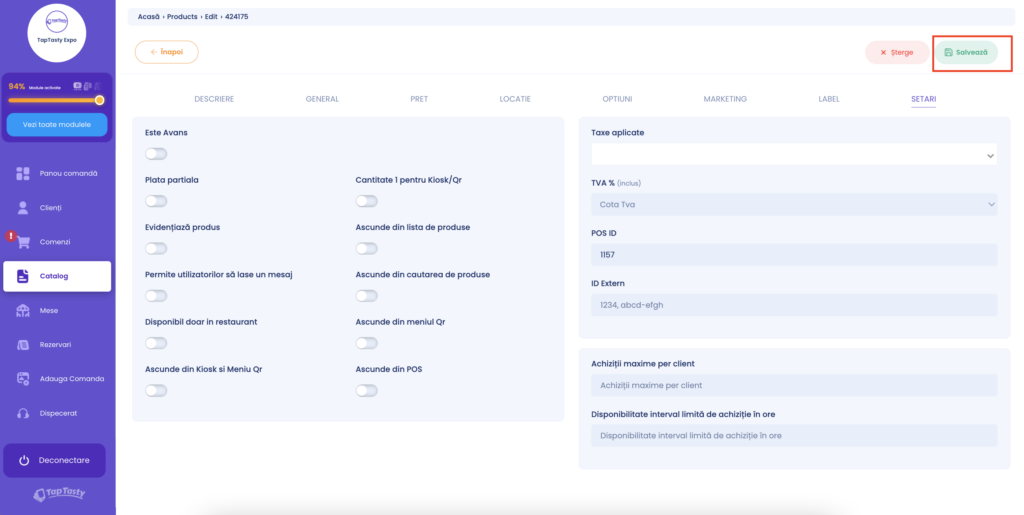
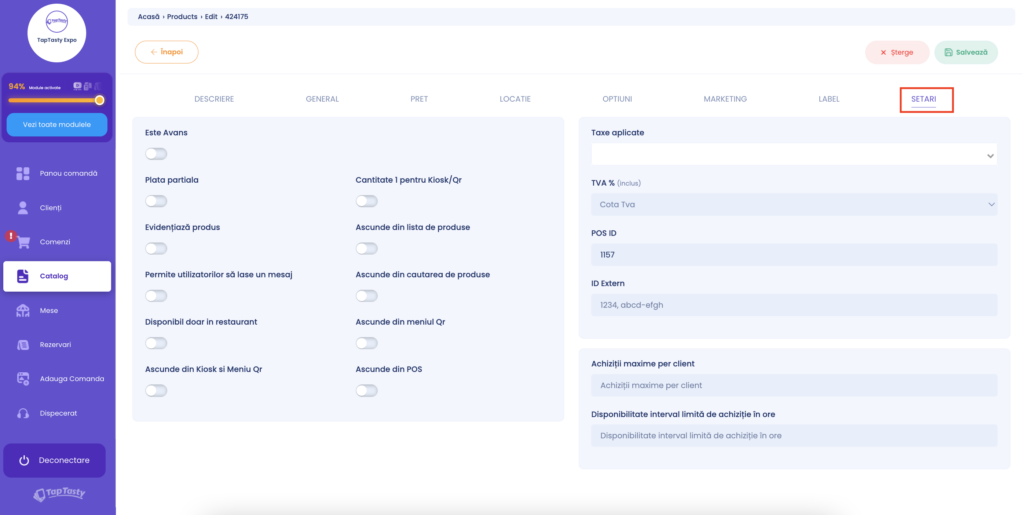
Settings
Partial Payment
Allows the customer to pay only a portion of the total order value.
Highlight Product
Marks the product as promoted or recommended and highlights it in the app.
Allow Users to Leave a Message
Enables a field through which the customer can add notes for the product (ex.: "no onions").
Available Only in Restaurant
Restricts the product to orders placed on-site (Kiosk or QR at table), without the option of delivery or pickup.
Hide from Kiosk and QR Menu
The product will not be displayed in the Kiosk interface or in the menu accessed via QR code.
Quantity 1 for Kiosk/QR
Limits the order to a single unit when placed through Kiosk or QR at table.
Hide from Product List
The product will not appear in the standard menu list. Useful for products used exclusively as ingredients or extra options.
Hide from Product Search
The product will not be displayed in search results by name.
Hide from QR Menu
Removes the product from the menu accessed by scanning the QR code.
Hide from POS
The product will not be visible in the POS interface used by the location's staff.
Applied Taxes
Select the taxes applicable to the product (ex.: Packaging, SGR). These are used when calculating the final price.
VAT % (included)
Allows setting the VAT rate included in the product price (ex.: 5%, 9%, 19%).
POS ID
The unique identifier used for integration with the TapTasty system and for synchronization with management systems.
External ID
A custom identifier used in external systems (ERP, internal management, custom reports, etc.).
After completing all the desired information, press Save in the upper right corner of the screen. The product will be created and will become available across all TapTasty sales modules.